This screen contains details for a particular session. From here you can, add, edit, or delete individual items; download all information in CSV format; and upload to the state compliance vendor.
Note: This example uses a Harvest Session, but the pertinent information is the same for all session types.
This page is made up of three sections: Session Info, Session Items, and the Upload Log.
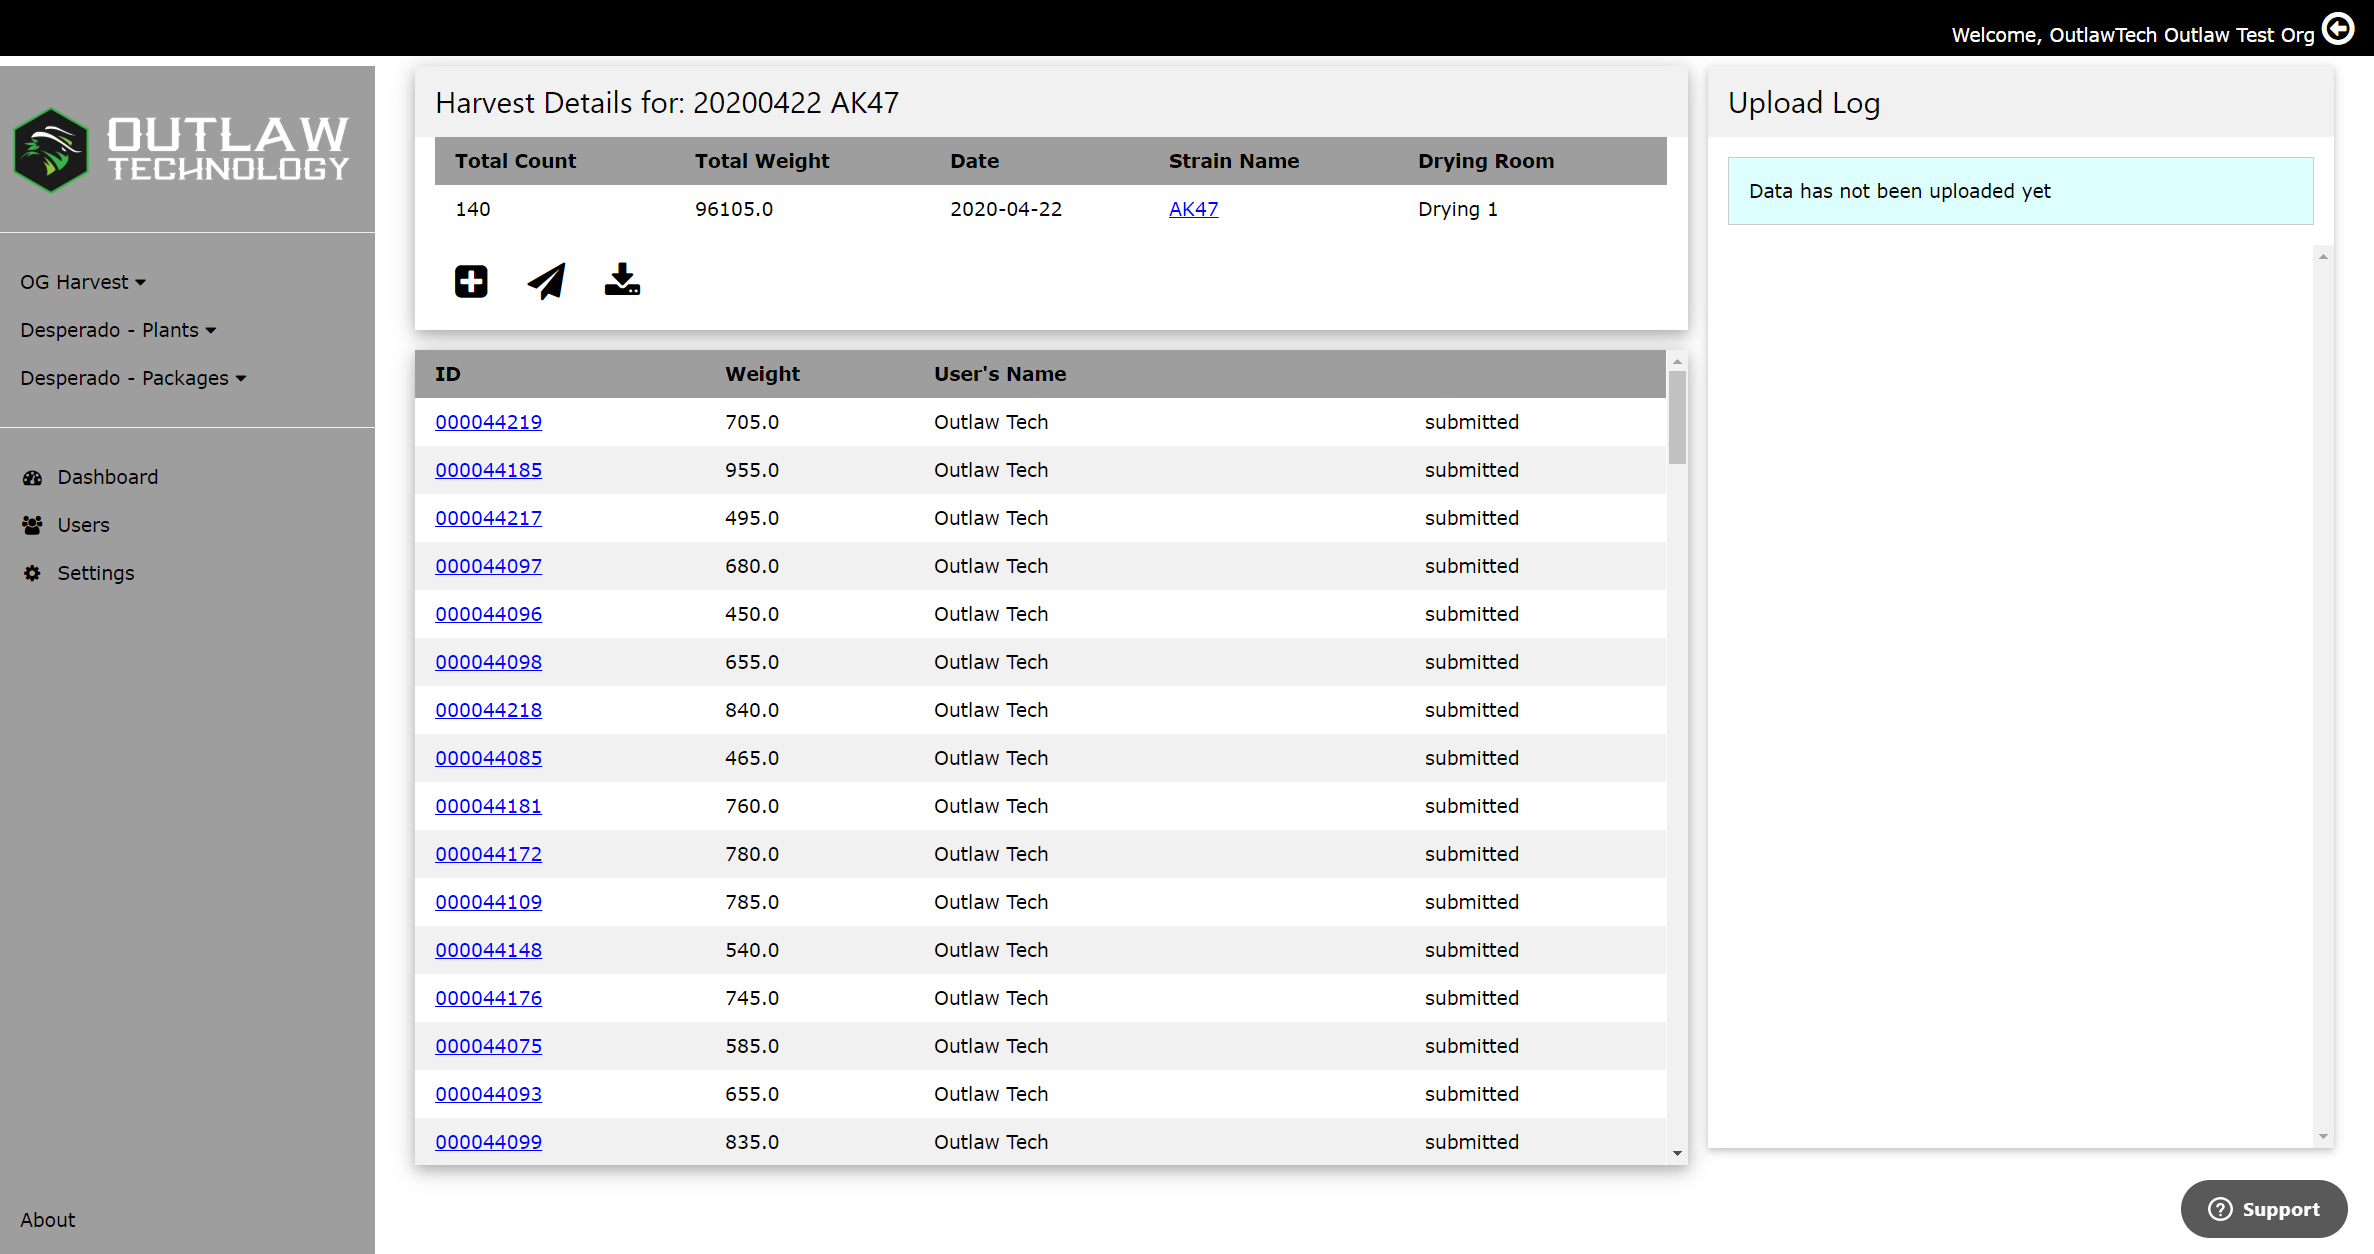
Session Info
At the top of the page is the Session Info section. This displays information that is common across the entire session. It also contains up to three action buttons. Available buttons will vary depending on session status and session type. In Progress sessions can be downloaded as a CSV, but they can not be submitted or added to until they are active.
Action Buttons

In the above picture, the action buttons are (from left to right):
- Add item - open a popup in which a session item can be manually entered
- Note: Only the suffix of a tag needs to be entered
- Submit - upload the data to state compliance vendors
- see this section for more information: Upload Log
- Download - compiles all session data into a CSV file (this process may take a few seconds) and then present the file for download
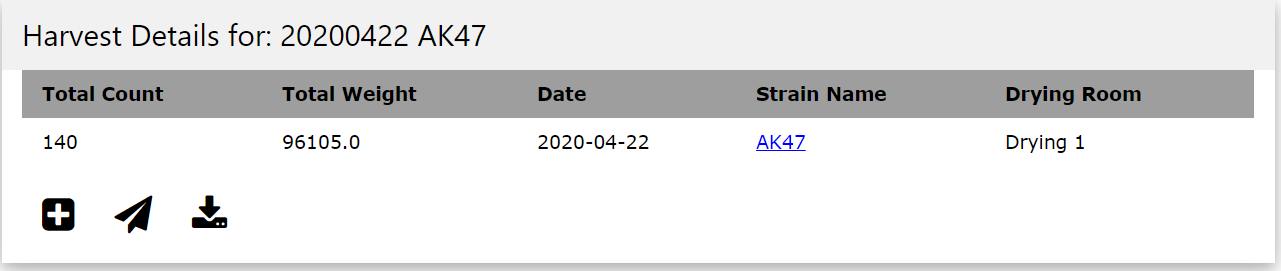
Session Items
This is a list of all items (plants or packages) in this session. The columns will vary depending on session type, but ID and User's Name will always be present (except for OG Harvest Waste Sessions, in which there is no ID). The far right column will display "submitted" if that item has been successfully uploaded to the state compliance system. Items not yet submitted will display applicable action icons.
Organizing this list
The list can be sorted by any column by clicking the column title (in this case, ID, Weight, or User's Name).
Item actions
For items not yet submitted these icons will display in place of the word "submitted".

- The first icon allows that item to be edited and clicking it will open a popup where data can be manually altered
- The second icon will delete that item (after a confirmation dialog)
If an item fails to upload to the state compliance system for any reason, an additional icon will be displayed as pictured below:

When this icon is clicked, a popup will appear displaying details of why that item's upload failed.
Column Description
- ID or Tag ID - the barcode/RFID value that was scanned
- Tag Status - (Desperado validation only) Three possible values:
- missing - the tag is supposed to be in the selected location but was not scanned
- extra - the tag is not supposed to be in the selected location but was scanned
- good - the tag is supposed to be in the selected location and was scanned
- First Seen - (Desperado only) The exact timestamp of when that tag was first scanned
- This can be used to determine exactly how long a particular inventory took
- Weight/Kill Weight - the weight value associated with a tag
- User's Name - The name of the user who was logged into the device when that tag was scanned
- Even if a user account is deleted, their name will still be associated with the items they handled
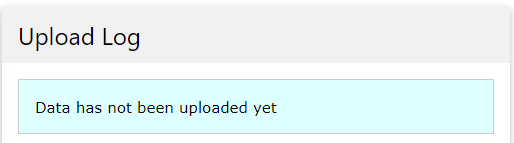
Upload Log
We understand that compliance is one of the most important aspects of this industry. To maintain compliance, all data must make it into the state compliance system. For this reason, we want to make it as apparent as possible when an item encounters an uploading error. The upload log does exactly this.
Before a session is submitted, the log looks like this:
Once the Submit button is clicked, the Upload Log will change to reflect the progress:

In the above picture, 50 tags have been successfully uploaded thus-far,
2 have failed to upload, and there are 100 in total.
If encountered, error messages will be displayed once the upload completes:
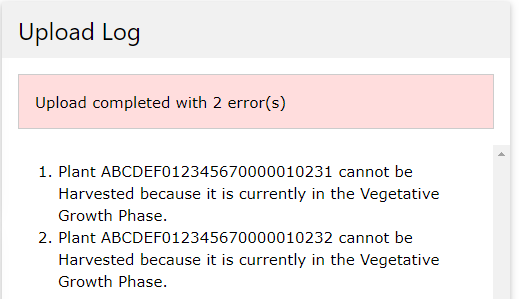
At this point you can fix the problem (in this case, change the growth phase of two plants), and then re-submit. When re-submitting, data that has already been successfully submitted will be ignored, so there is no concern of duplicate data.
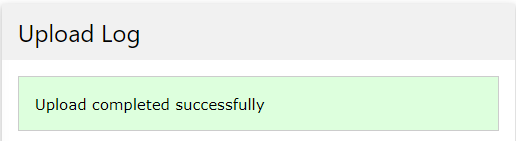
After all items have been successfully submitted, the upload log will look like this:
Comments
0 comments
Please sign in to leave a comment.